
Complete Guide to Setting Up, Connecting, and Optimizing Your Experience with B Beat
How to Set Up and Connect B Beat for a Live Performance
Setting up B-Beat for a live performance involves a series of simple yet crucial steps to ensure everything works correctly. In the following steps, we will guide you through the process of preparing B-Beat, making all the necessary connections, and ensuring it's ready to shine during your performance.
Step 1: Powering On and Setting Up B Beat
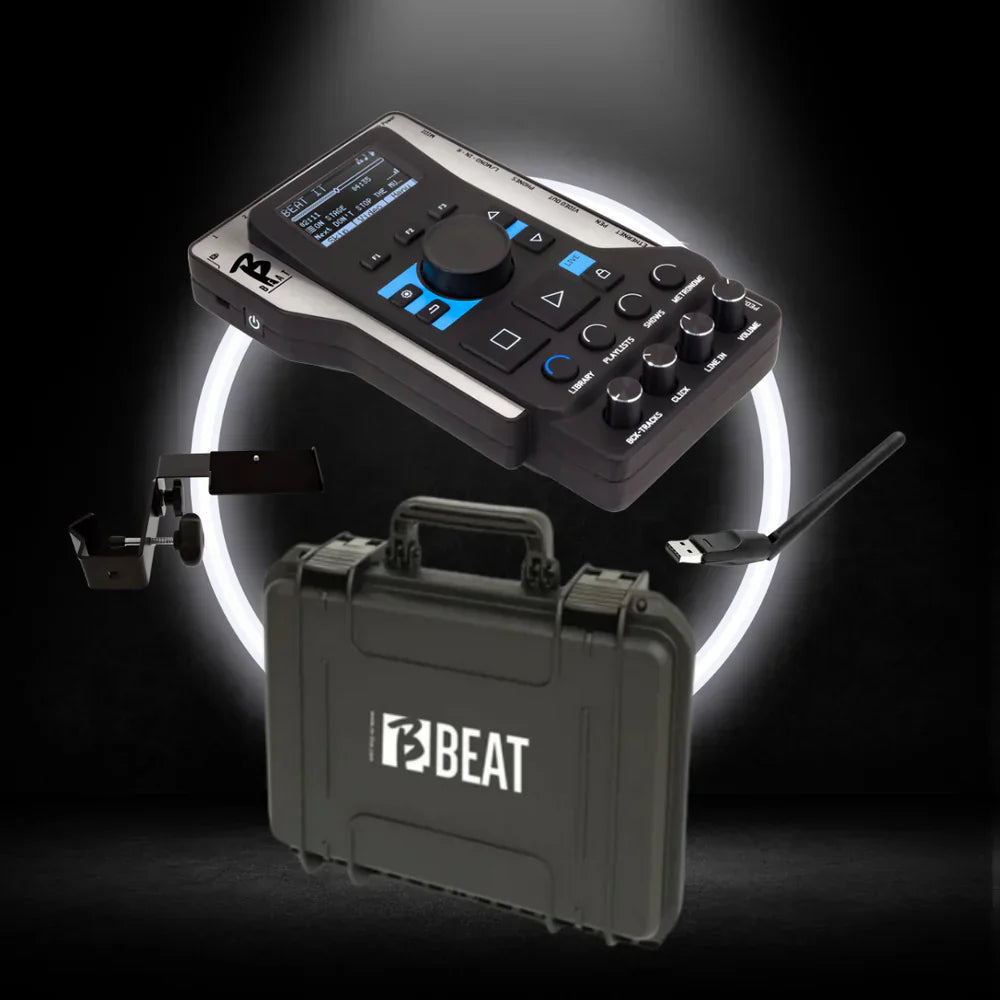
Connect your B-Beat audio workstation to a power source using the supplied power adapter or a compatible external battery.
Press and hold the Switch On button until the device turns on.
Adjust the screen brightness and other settings from the System menu.
Step 2: Transferring Data to B Beat
B-Beat can store audio tracks, videos, and images for your live performances.
Transfer options:
- From a computer: Connect via an Ethernet cable and use the B-Beat Manager software to transfer files.
- From a USB drive: Insert a flash drive containing MP3, WAV, MP4, or MOV files.
- From a wireless network: If you have the M-Pen accessory, connect to a Wi-Fi network to transfer files wirelessly.
How to Connect B Beat to External Devices
B-Beat is a highly versatile device designed to easily integrate with various external equipment, enhancing the quality and flexibility of live performances. Whether you need to connect it to a sound console, a MIDI controller, a control pedal, or a video output system, B.Beat offers multiple connection options to suit different stage setups.
How to Connect a Start/Stop Pedal
You can connect a control pedal to start and stop playback without touching the device. Connecting a start/stop pedal to B-Beat allows you to control playback without having to physically interact with the device, providing greater convenience and flexibility, especially during live performances. Here’s how to set it up:
- Choose the Right Pedal: Ensure you have a compatible start/stop control pedal, typically one with a 6.5mm jack or another compatible connection depending on the pedal type.
- Locate the Input: On the B-Beat device, find the designated input for control pedals, usually labeled "Control Pedal" or "Start/Stop" input.
- Plug In the Pedal: Connect the pedal to the input port using the appropriate cable, ensuring the connection is secure.
- Configure the Device: Once the pedal is connected, configure B-Beat to recognize the pedal as the trigger for starting and stopping playback. This may involve adjusting settings within the device or software interface, depending on your specific setup.
- Test the Setup: Press the pedal to ensure that it correctly starts and stops the playback. If needed, adjust sensitivity or response settings to suit your preference.
How to Connect a Start/Stop Pedal
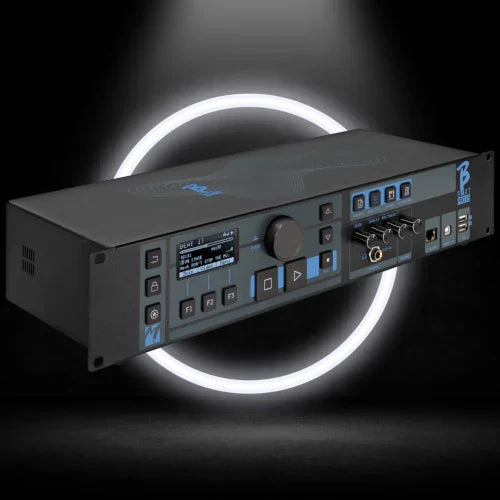
B-Beat not only features six mono audio outputs but also has an additional stereo output, giving you even more flexibility in setting up your sound system according to your performance needs. Here’s how to connect the audio outputs to a console or mixer:
- Identify the Outputs: On the B-Beat device, locate the six mono audio outputs (labeled "Output 1" through "Output 6") and the additional stereo output (usually labeled "Stereo Out"). The mono outputs are designed to send separate tracks, while the stereo output can be used to transmit a stereo mix or a track that requires a combined channel.
- Choose the Right Cables: For the mono outputs, you will typically use 1/4-inch TRS or TS cables, while for the stereo output, you will need an appropriate cable with a 6.5mm connector (or whatever type your equipment requires) that is compatible with stereo inputs on your mixer or sound system.
- Connect the Outputs to the Mixer: Plug each mono output cable into its corresponding channel on the sound console or mixer. If you want to send a stereo mix, connect the stereo output to the appropriate channel that accepts stereo input on the mixer.
- Adjust Mixer Settings: Once the connections are made, adjust the input levels and EQ settings on your mixer to optimize the sound. Set the volume for each track as needed and adjust the mix to achieve the desired balance.
- Test the Setup: After everything is connected, test the sound by playing back tracks from B-Beat. Monitor the audio through the sound console or monitoring system to ensure that each track is being sent correctly and at the right volume to each channel.
- Fine-Tune the Output Distribution: If needed, adjust the output distribution to achieve the best sound possible based on your mix and the channels you are using. You can further customize the routing of outputs on B-Beat to fit your particular setup.
How to Transfer Files via Ethernet Connection
To manage content from a computer, connect an Ethernet cable to B-Beat and use the B-Beat Manager software. This connection allows you to transfer audio tracks, configure audio outputs, organize playlists, and perform other tasks quickly and efficiently.
- Connect the Ethernet Cable: Plug one end of the Ethernet cable into the corresponding port on B-Beat and the other end into your computer or a local network if it's part of a shared network. Make sure both connections are properly established for stable data transfer.
- Open the B-Beat Manager Software: On your computer, open the B-Beat Manager software, which is the main tool for managing B-Beat's content. If you don’t have the software yet, download and install it from the official website.
- Establish the Connection: Once B-Beat Manager is open, the software will automatically detect the B-Beat device connected via Ethernet. Ensure that B-Beat is powered on and properly connected to the network for it to be recognized by the software.
- Manage Files: Using B-Beat Manager, you can start transferring audio tracks from your computer to B-Beat by simply dragging and dropping the files into the content area. You can also configure audio outputs, organize playlists, and adjust any other settings as needed.
- Verify the Transfer: After transferring the files, check that everything has been copied correctly to B-Beat. You can do this by reviewing the playlists and ensuring the tracks are accessible and organized according to your preferences.
How to Sync with Other Devices via MIDI
The MIDI port on B-Beat allows you to connect the device to a wide range of musical equipment, such as synthesizers, MIDI controllers, and other devices, making it easier to sync and automate signals during your performance.
To sync B-Beat with other devices via MIDI, start by locating the MIDI input and output ports on the device. These are usually labeled as "MIDI In" and "MIDI Out." Ensure that you have the appropriate MIDI cable to establish the connection between B-Beat and the external equipment. Once the devices are connected, configure them to recognize and sync with the MIDI signals by selecting the correct MIDI channels on both B-Beat and the connected devices. This step ensures that both devices can communicate with each other properly.
After completing the connection and configuration, test the synchronization by activating playback or other functions on B-Beat or the connected devices. Make sure that everything stays in sync and responds as expected. If needed, adjust the MIDI parameters or channels to fine-tune the connection.
How to Play Content from a USB Drive
If you prefer to avoid using a computer, B-Beat gives you the option to play content directly from a USB drive. This method is ideal for situations where you don't want to rely on a computer or additional software during your performances, as it allows you to quickly and efficiently access your audio and video files.
To get started, simply plug the USB drive into the corresponding port on B-Beat. The device will automatically recognize the drive and allow you to access all the files stored on it, as if they were part of its own system. You can browse through your folders and select the tracks or videos you want to play during the performance.
How to Control B Beat Wirelessly via Wi-Fi
If you have the M-Pen accessory, you can connect B-Beat to a Wi-Fi network and control it from a smartphone or tablet, giving you greater flexibility in managing the device.
If you're using multiple external devices simultaneously, organize your cables properly to prevent tangling or accidental disconnections during a performance.
How to Troubleshoot Common Issues When Using B Beat Live
When using B-Beat live, it's important to be prepared for potential issues that may arise during a performance. Here, we highlight the most common problems and how you can solve them to ensure a smooth and uninterrupted performance.
"No sound from the audio outputs."
✔ Check that the audio outputs are properly configured in System > Output Level.
✔ Ensure that the volume potentiometers are not muted.
"The device does not recognize the USB drive."
✔ Make sure the USB drive is formatted in FAT32.
✔ Try another USB drive to rule out issues with the current one.
"The video is not playing correctly."
✔ Convert the file to MP4 or MOV with a 1920x1080 (Full HD) resolution.
✔ Ensure the file is not corrupted.
"B-Beat freezes or responds slowly."
✔ Restart the device by holding the Switch On button for 5 seconds.
✔ If the problem persists, perform a Factory Reset from the System menu.
Leave a comment
This site is protected by hCaptcha and the hCaptcha Privacy Policy and Terms of Service apply.